Why Typing Basics?
Typing Basics was designed by a Doctor of Occupational Therapy with over 20 years experience working with students to develop keyboarding and touch typing skills.
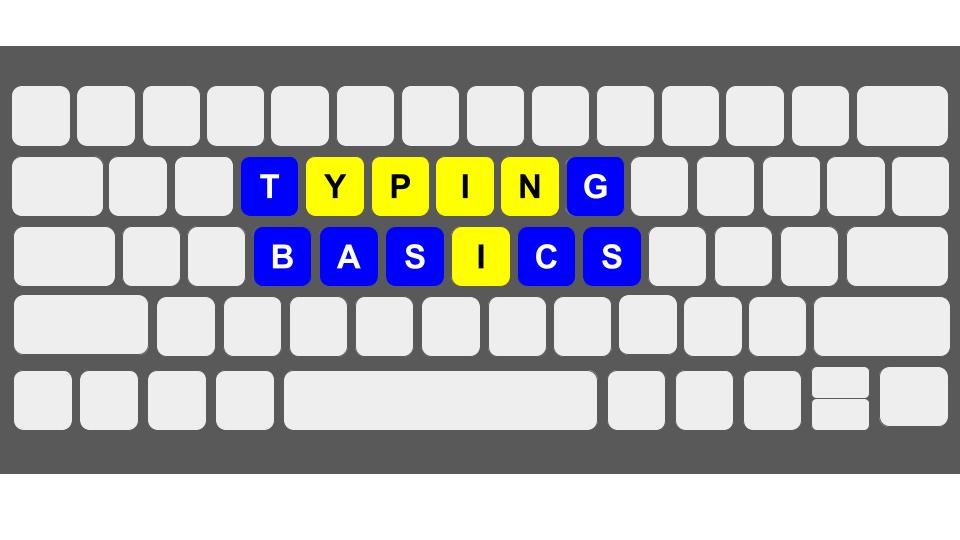
Typing Basics teaches students to type letters on the left side of the keyboard with their left hand and letters on the right side of the keyboard with their right hand. The students learn to visualize the left side of the keyboard as “blue“ and the right side of the keyboard as “yellow“.
Typing Basics is easy for students of all ages and abilities to master and it sets students up for success in the classroom and beyond!
the typing basics way!
It’s all about the
blue and yellow hands!
how it works: the keyboard
The B is on the left side of the keyboard which is why the left hand is the ”blue” hand and the Y is on the right side of the keyboard which is why the right hand is the ”yellow” hand.
The spacebar is green because blue and yellow make green and both thumbs can use the spacebar! It just makes sense!
Students quickly learn that the “blue” hand types letters on the left side of the keyboard and the “yellow” hand types letters on the right side of the keyboard. This helps the students locate letters quickly because they only have to look at the keys on half of the keyboard!
typing basics: level 1
Level 1 is where it all begins! Students will locate and type each letter of the alphabet using either their “blue“ or “yellow“ hand. Each task card contains a letter and a blue or yellow hand indicating which hand to use to type each letter.
Once students have mastered using one hand at a time to type individual letters, they are ready for Levels 2 and 3.
typing basics: Levels 2 and 3
In Levels 2-3, students begin typing words! Each word contains letters that can be typed with either the “blue” or “yellow” hand.
In Level 2, students will type a series of blue words followed by a series of yellow words.
In Level 3, students will alternate between blue and yellow words.
Once students have mastered typing words with either the “blue” or “yellow” hand, they are ready for Level 4.
This is where the magic happens!
typing basics: Level 4
In Level 4, students begin typing words that have both blue and yellow letters!
Each letter of the word is either blue or yellow based on whether the letter is on the left side of the keyboard or the right side of the keyboard.
Of course the” blue” and “yellow” hands still appear on each screen as a visual reminder of which hand to use to type each letter based on whether the letter is blue or yellow.
Typing Basics gets students typing with both hands quickly because it makes sense to them!
explore more typing basics content
There is much more to learn with Typing Basics! There are decks that help students learn the spacebar, shift keys, and punctuation! There are even decks that help students practice what they have learned by typing names of people, names of sports teams, famous professional sports players, and states and capitals!
Click on each deck below for a preview of Typing Basics: Spacebar, Restaurants, and Statements.
Click here to explore the entire Typing Basics library on Boom Learning.

Click here to get started
Click here to get started
typingbasics@yahoo.com
Check out OTDocShop on Boom Learning for more information!


